


IT Monkey will place code here as examples of what Cireson's consulting team has to offer as well as examples for public consumption to benefit the Microsoft System Center community as a whole.
DISCLAIMER
All files and projects located here come as is and without any warranty or support. We will attempt to improve the projects as time goes on based on customer and community demand. Comments and improvements are welcome as well as customization requests. Your use of these Cireson Uploads is subject to our Terms of Use.
Cireson's support team has no information on these projects outside of what you have available and will not provide support for these enhancements, extensions, and scripts.
Dont forget to checkout solutions uploaded by our customers, partners and community members here.
Example: Cireson SCSM Portal on Docker Windows Containers
 Joe_Burrows
Cireson Devops Super IT Monkey ✭✭✭✭✭
Joe_Burrows
Cireson Devops Super IT Monkey ✭✭✭✭✭

Seem all the cool peps are running Applications in
containers these days, and considering I haven’t posted in a while - I thought I’d
share a working example to quickly create instances of the Cireson Portal for your
dev, test environments to help you be one of those cool peps ![]() .
.
Publish the different versions to your container repo to give you the ability to freely move the portal around your various environments to automate the deployment, recovery or scaling of the portal quickly.
Overview Steps:
- Creating the Docker Host
- Creating the GSMA Account, Credspec file and Permissions
- Building the Portal Docker Image
- Running the Image
On a Windows 2016 server, Start up a PowerShell command
window running as an administrator and run the following commands to download
and install the latest version of Docker:
<p>Install-Module DockerMsftProvider -Force </p><p><br></p><p>Install-Package Docker -ProviderName DockerMsftProvider -Force</p>
Step 2: Permissions
As docker does not yet have active directory support, we must configure a few things in AD and the docker host to have the portal permissions working happily as they would with a domain joined server. Using Group Managed Service Accounts on the host any service running on the nested container as LocalSystem can act as the the gMSA account as their domain indentity: (see https://docs.microsoft.com/en-us/virtualization/windowscontainers/manage-containers/manage-serviceaccounts for more information)

- Create the gMSA account, in my example I created the account called GMSA_Docker (See https://blogs.technet.microsoft.com/askpfeplat/2012/12/16/windows-server-2012-group-managed-service-accounts/ for more information about creating gMSA Accounts)
New-ADServiceAccount
-name GMSA_DOCKER -DNSHostName GMSA_DOCKER.EVALLAB.LOCAL
-PrincipalsAllowedToRetrieveManagedPassword 'Domain Computers'
- Import AD Modules & Install the gMSA Account on the Docker Host
<p>Add-WindowsFeature </p><p>
RSAT-AD-PowerShell </p><p>
Import-Module ActiveDirectory </p><p><br></p><p>Install-AdServiceAccount GMSA_DOCKER </p><p><br></p><p>Test-AdServiceAccount GMSA_DOCKER</p>
- Create the CredentialSpec file using CredentialSpec.psm1
Import-Module
./CredentialSpec.psm1
New-CredentialSpec -Name GMSA_DOCKER -AccountName GMSA_DOCKER
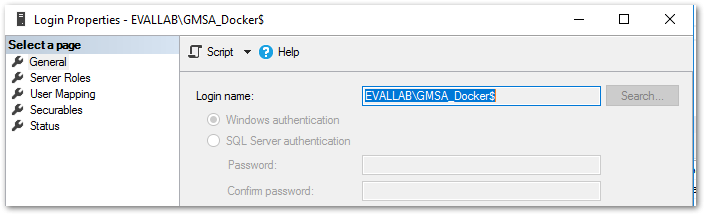
- .Add GMSA_Docker to your SCSM Administrators group for SCSM, and grant GMSA_DOCKER$ permissions in SQL Server to ServiceManager & ServiceManagement (Or if creating a new portal database - grant sysadmin rights)

Comments
If you not familiar with docker, I’d recommend following the examples on the docker website here.
First we need to automate everything the portal needs in order to get built, which we declare in a dockerfile. Luckily the Cireson Portal comes already scripted in PowerShell for all the pre-reqs and install - so the only changes we need to make to the install process is to have the AppPool, CacheBuilder and Platform cache run as LocalSystem so the container can impersonate the gMSA account that has the correct SQL and Service Manager permissions.
We will need the following on a new container to complete a build with the Cireson Portal
Bring this all together in a dockerfile – too easy right? Will break about the dockerfile with what each step is doing (The complete dockerfile used in this example can be downloaded from the post above and adjusted to suit your environment).
<p># escape=` </p><p><br></p><p>FROM microsoft/dotnet-framework:3.5 </p><p><br></p><p>LABEL maintainer "Joe Burrows" </p><p><br></p><p># Container Parameters </p><p><br></p><p>ARG smp_setup_zip_uri=https://ciresonreleases.blob.core.windows.net/servicemgrportal/PreviousVersions/8.4.3.2016.zip </p><p><br></p><p>ARG ManagementDBName=ServiceManagement </p><p><br></p><p>ENV ManagementDBName ${ManagementDBName} </p><p><br></p><p>ENV smp_setup_zip_uri ${smp_setup_zip_uri} </p><p> </p><p>SHELL ["powershell","-Command"]</p>By default the escape character in Docker is \ - this becomes a pain when working with Windows containers so is changeable by declaring # escape=` at the beginning.
The image we are using as the base is the Official Microsoft Server Core Image for docker with dotnet-framework 3.5
Then we set ARG which are the augments we can use when running a docker build (more on this latter), we are setting a default in case nothing is declared in the docker build command – and then storing them as environment variables that can called in the scripts in the steps latter in the docker file.
Next we create our Local Admin User using the net user command and net localgroup with a super secure password
Next we want create our working folders, download the portal installer ZIP to our image from our Environment Variable we stored above, download our custom scripts, unblock the zip, unzip, run the installpreqs and remove that annoying Default IIS Web Site.
Before we run the InstallPortal.PS1 script we need to edit the script so it installs the App Pool to Run as LocalSystem (Rather than a Windows AD User), this is achieved by finding and replacing some lines in the script as below:
Then we are good to declare the parameters the InstallPortal script requires for installation:
<p>RUN
& {C:\Setup\InstallPortal.ps1 ` </p><p><br></p><p>-ManagementServer 'EvalLab-SCSM.evallab.local' ` </p><p><br></p><p>-SQLServer 'EvalLab-SQL.evallab.local' ` </p><p><br></p><p>-PortalUser '.\ContainerAdmin' ` </p><p><br></p><p>-SiteRootPath 'C:\InetPub\' ` </p><p><br></p><p>-PortalPassword 'P@ssw0rd' ` </p><p><br></p><p>-CreateManagementDB $true ` </p><p><br></p><p>-ManagementDBName $ENV:ManagementDBName ` </p><p><br></p><p>-ExecuteDac $true ` </p><p><br></p><p>-InstallManagementPacks $true ` </p><p><br></p><p>-ApplicationTitle 'Cireson Eval Lab Portal' ` </p><p><br></p><p>-InstallWebsite $true ` </p><p><br></p><p>-ManagementServerBinaryPath '\\EvalLab-SCSM.evallab.local\c$\Program Files\Microsoft System Center\Service Manager\SDK Binaries' ` </p><p><br></p><p>-RunCacheBuilderAsService $true ` </p><p><br></p><p>-CacheServiceUserName '.\ContainerAdmin' ` </p><p><br></p><p>-CacheServicePassword 'P@ssw0rd' ` </p><p><br></p><p>-AnalystsADGroup 'SCSM Analysts' ` </p><p><br></p><p>-AssetManagementADGroup 'SCSM Asset Managers' ` </p><p><br></p><p>-KnowledgeManagerADGroup 'SCSM KB Managers' ` </p><p><br></p><p>-SMSQLServer 'EvalLab-SQL.evallab.local' ` </p><p><br></p><p>-SMTPServerName 'EvalLab-SCSM.evallab.local' ` </p><p><br></p><p>-SMTPServerPort 25 ` </p><p><br></p><p>-SMTPEmailReturnAddress 'Cireson@EvalLab.Local' ` </p><p><br></p><p>-AnalyticServiceUserName '.\ContainerAdmin' ` </p><p><br></p><p>-AnalyticServicePassword 'P@ssw0rd'` </p><p><br></p><p>-InstallAnalytic $true ` </p><p><br></p><p>-AnalyticFrequencyStartDate '2017-12-09T16:17:43.747224+00:00' ` </p><p><br></p><p>}; `</p>
Next we want to run our custom script that we downloaded to the image to switch the installed services from our local user to LocalSystem
And also Delete the customspace folder (As we want to bind the customspace folder from the dockerhost to the container – to make customization easier and if we delete containers we don’t want to lose customizations)
The last step is optional but I create a scheduled task to re-run the DAC file on container startup incase the image was pulled from another environment I want to make sure the database gets upgraded correctly.
With all the above in a file called ‘dockerfile’ we can then run docker build to create an image with all the above steps run. Set our build arg to the installer zip we want in the below example we using 8.4.3.2016. We do need to set –security-opt to tell docker to run as GMSA_Docker:
Now we successfully have 8.4.3.2016 saved into an image we can quickly run or share across multiple environments
docker images will show the newly created image with the tag:
Now we have the image we want to run the image using docker run and setting the needed switches:
https://community.cireson.com/discussion/4828/devops-containerizing-the-cireson-portal-for-dev-test-user-acceptance-testing